Here's how to make it. First, boil your potatoes until they are just done. They should be firm, not too mushy. You want the potatoes to hold their shape. If you don't have fingerling potatoes, small new potatoes work well too. Cut the potatoes into thin slices. For the dough, we used dough from our restaurant, Mia's Pizza and Eats; you can of course make your own, buy from your grocer, or head to your favorite pizzeria and ask to buy a small dough ball. Drizzle the dough with olive oil, sprinkle with kosher salt and freshly cracked pepper, layer on the potatoes and the rosemary, add the pancetta (first fry it in a pan to crisp it), and top with shredded Gruyere; if you don't have Gruyere, a Swiss cheese or even a sharp cheddar would work well here too. Cook on a pizza stone on your grill for about four minutes; check the pizza often and give it a 3/4 turn each minute. You will love this combination!
Monday, July 11, 2011
Grilled Fingerling Potato Pizza
Farm fresh potatoes are such a delight; we created this grilled fingerling potato pizza using potatoes found at the farmer's market, home-grown rosemary, salt, pepper, olive oil, and Gruyere cheese. I love how the various colors of the potatoes delight the eye, and the flavor is unbelievably good. We have also made this pizza with diced pancetta which makes the pizza taste almost like a morning breakfast...in Italy.
Monday, July 4, 2011
Black and Bleu Pizza
- pizza dough
- olive oil
- salt and pepper
- thinly sliced steak, cooked rare
- bleu cheese crumbles
- fresh thyme
- caramelized onions or fresh red onions
- portabella mushrooms (optional)
- fresh cilantro or parsley
The traditional Black and Bleu combination found in steakhouses just works, and it works like magic on pizza. When making the pizza, we used olive oil and salt and pepper as our base. Then we added rarely cooked flank steak that had been sliced thin. You can use any leftover steak you have; I highly suggest that it not be cooked well before using it on this dish because it can dry out quickly. Next we added the bleu cheese crumbles. We also add fresh thyme and red onions. We have also used caramelized red onions which add another level of flavor here, and I highly suggest taking the time to caramelize your onions (just saute in olive oil (don't skimp, use a fare amount) with salt and pepper until golden and brown (takes about 15 minutes) -- I also add a little brown sugar to quicken the process and develop the sweetness). We have also added portabella mushrooms to the pizza which only adds to the depth of flavors, but they aren't needed. I highly suggest that you finish the pizza by adding fresh cilantro or parsley to the pizza after it has cooked; this provides a note of freshness to the palate.
Labels:
4th of July,
black and bleu,
Cumming Georgia,
eating,
food,
grill,
grilling,
Mia's Pizza and Eats,
pizzeria,
restaurant,
steak
Wednesday, June 29, 2011
Pizza on the Grill, Simple Tweaks That Make a Difference
Hot. Devil hot. Hell hot. Hotlanta. Hot, hot, hot. The cicada's electric song gives the heat its voice, enveloping the mind in waves of sound that only intensifies the heavy blanket of ninety-degree weather. We light the grill, as if hypnotized, controlled by some wild and carnal need to add to this fiery intensity. It is fitting that we begin our journey into grilling pizza on a day that feels like what it must feel like inside a wood-fired oven.
Grilling pizza is addictive: it's fun, it's flavorful, it's easy. The first thing to understand about grilling pizza is the heat. Your grill can get very hot, which is a good thing because pizza cooks best at high temperatures, but the heat can scorch the bottom of the pie before the top of the pie cooks through. There are things to do to regulate the heat. First, I think a good pizza stone is in order. There are lots on the market. We use an All Clad stone that we have owned for years; the important thing is that the stone is thick and able to withstand high temperatures; some stones can crack due to the heat, so it's important to use a good stone. When we cooked the pizza on the stone only, it scorched the bottom of the pizza very quickly, and the toppings were nowhere near done.
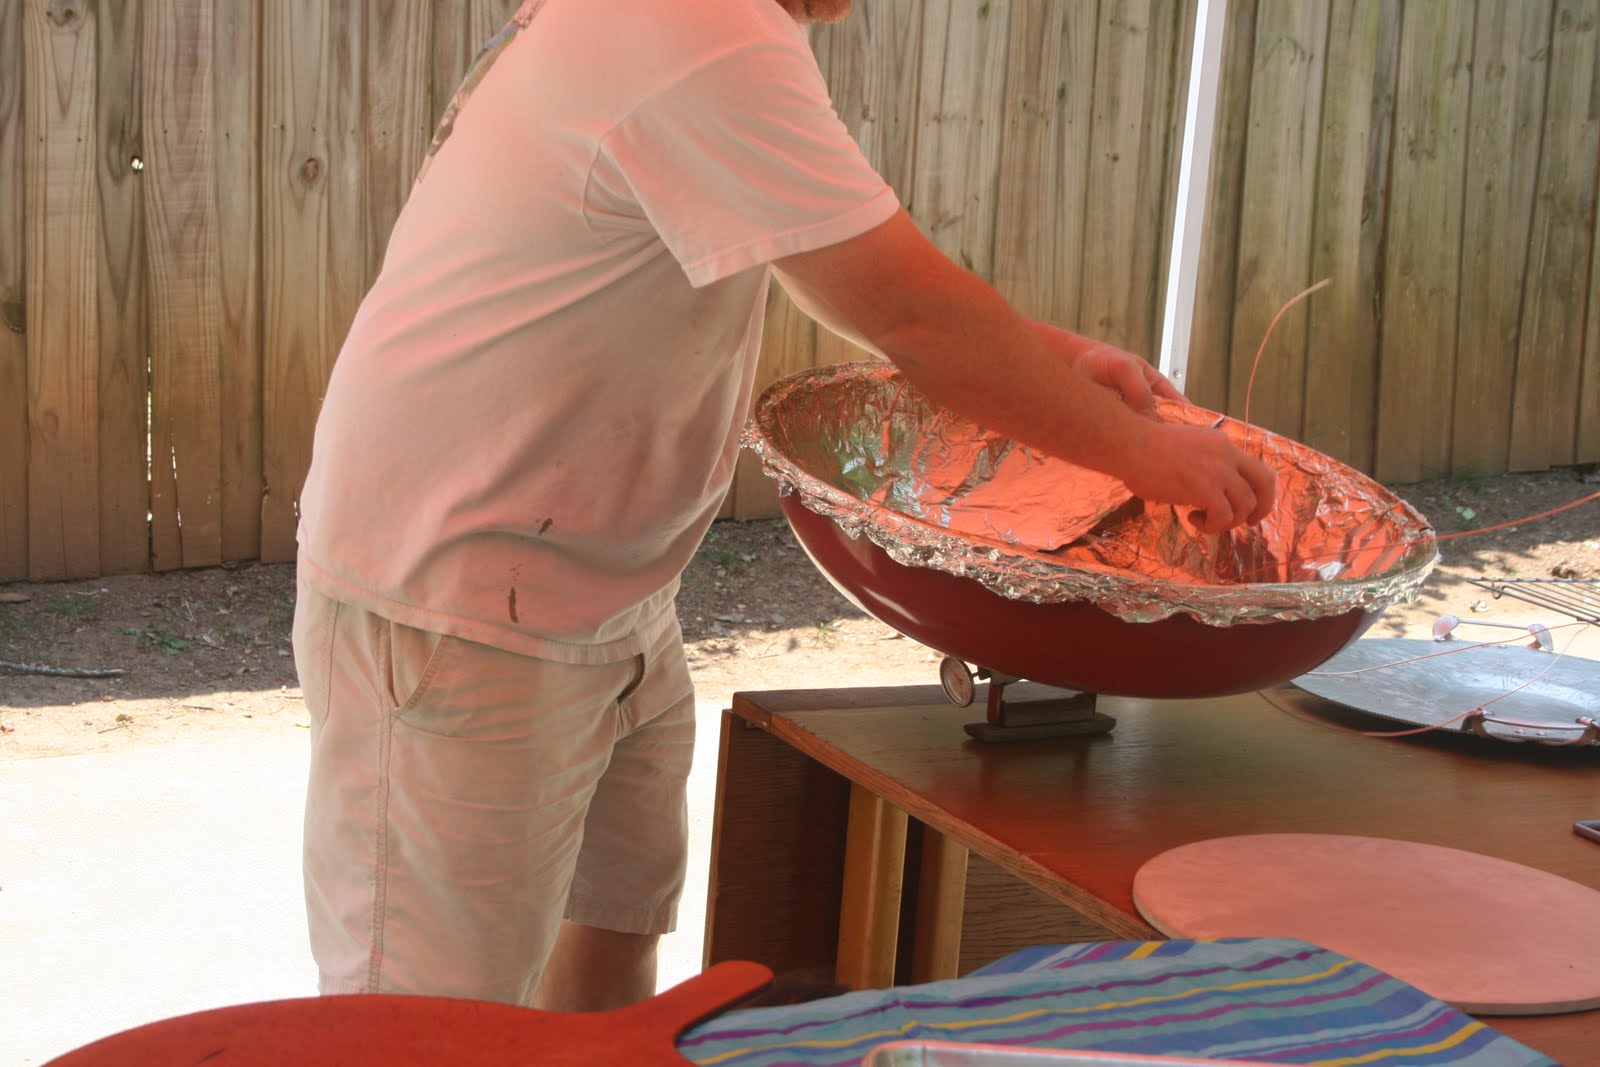
To create space between the pie and the heat, we used a flower pot base which helped enormously. The final thing we did to help regulate the heat was to wrap the inside of the grill lid in aluminum foil, and we added a smaller grill stone to the lid by attaching it with copper wire. The smaller stone was donated by a neighbor -- I am unsure of the brand, but it is thinner than our All Clad. It serves its purpose well, which is to bring heat above the pie as well as below. Once we modified the grill in this way, we were able to cook pies that came out perfectly each time.
It takes roughly 3-4 minutes to cook a pizza fully on the grill. Grilling enhances the flavor of the dough, which is why many of the pizzas we have grilled so far haven't been traditional ones with red sauce. Grilling pizza opens the imagination, and the pizza dough becomes the muse. I will do many posts about the various types of pizzas we have made on the grill. We hope to inspire you through pizza.
Grilling pizza is addictive: it's fun, it's flavorful, it's easy. The first thing to understand about grilling pizza is the heat. Your grill can get very hot, which is a good thing because pizza cooks best at high temperatures, but the heat can scorch the bottom of the pie before the top of the pie cooks through. There are things to do to regulate the heat. First, I think a good pizza stone is in order. There are lots on the market. We use an All Clad stone that we have owned for years; the important thing is that the stone is thick and able to withstand high temperatures; some stones can crack due to the heat, so it's important to use a good stone. When we cooked the pizza on the stone only, it scorched the bottom of the pizza very quickly, and the toppings were nowhere near done.
To create space between the pie and the heat, we used a flower pot base which helped enormously. The final thing we did to help regulate the heat was to wrap the inside of the grill lid in aluminum foil, and we added a smaller grill stone to the lid by attaching it with copper wire. The smaller stone was donated by a neighbor -- I am unsure of the brand, but it is thinner than our All Clad. It serves its purpose well, which is to bring heat above the pie as well as below. Once we modified the grill in this way, we were able to cook pies that came out perfectly each time.
It takes roughly 3-4 minutes to cook a pizza fully on the grill. Grilling enhances the flavor of the dough, which is why many of the pizzas we have grilled so far haven't been traditional ones with red sauce. Grilling pizza opens the imagination, and the pizza dough becomes the muse. I will do many posts about the various types of pizzas we have made on the grill. We hope to inspire you through pizza.
Saturday, January 22, 2011
Carne Asada Pizza
I promised a second blog on holiday leftovers, and here it is, finally. I know it is way too late to use your Christmas leftovers, but this pizza is worth the wait.
For Christmas dinner this year, we served beef tenderloin. I am now a convert, no more turkey or ham for me. I think I shall always serve beef tenderloin from this Christmas forth. Delicious doesn't seem appropriate enough a word to describe it. Heaven-on-a-plate, maybe works. There must be a beautiful Italian or Spanish word that fits. Celestiale? ParadisÃaco? The fact that there were any leftovers is only because I thought ahead and made more than the family could eat.
I have to give credit for this pizza to the manager of our favorite Mexican restaurant in Alpharetta, El Azteca. One night, over a year ago, on a rare date with my husband, Norma suggested that we try making a carne asada pizza at Mia's. I had imagined such a pizza for a while, so I figured what better way to use up that leftover beef tenderloin than to make a carne asada pie?
To begin with, I had to make a sauce. I didn't want to use a traditional red sauce, so I got out the food processor and threw in some onion, cilantro, and tomatoes. I also added some ground almonds to give it a little texture -- almost creating a cilantro pesto. With the addition of some salt and pepper, it turned out to be a great backdrop for the other ingredients. We used sliced red onions, beef tenderloin, freshly grated parm, and fresh cilantro as the toppings. When making pizza in your home oven, I suggest a 450 degree temperature, and if you can get your hands on one, use a pizza stone. Be sure to allow the pizza stone to preheat with your oven because it can't work its magic if it is cold. Bake your pizza until the dough is a nice, golden color and until the cheese is bubbly. This pizza was divine. Truly one of the best pizzas I have ever had.
Labels:
carne asada,
El Azteca,
Mia's Pizza and Eats,
pizza
Thursday, December 30, 2010
Leftovers Are New Again
With the holidays comes that special type of inspiration in the kitchen: what to do with leftovers. The ritualistic creative endeavor of turning leftovers into a masterpiece is probably my favorite part of the holidays. I have even served an entire Christmas meal in leftover fashion, skipping the ceremonial pomp and circumstance of carving and serving a turkey and jumping right into the luscious fun of slapping turkey onto my favorite slab of crusty bread drizzled with Dijon mustard and topped with an aged Swiss cheese, crispy romaine lettuce, and juicy tomato slices. I am reminded of the scene in A Christmas Story when the neighbor's hounds devour the Parker family's feast, and Ralphie laments: "The heavenly aroma still hung in the house. But it was gone, all gone! No turkey! No turkey sandwiches! No turkey salad! No turkey gravy! Turkey Hash! Turkey A La King! Or gallons of turkey soup! Gone, ALL GONE!" I relate on the deepest personal level to that scene. I really couldn't imagine a holiday without leftovers. This year my muse has been pizza as I figure what to do with the huge slabs of meat cooked at holiday time. This post begins a two-part kitchen journal on my leftover pizza excursion.
For Thanksgiving, we made a Crock pot ham; it was just the three of us, a low key affair, and we made enough ham to have leftovers for days and days and days. The Crock pot ham recipe was simple: ham, ginger ale, and apricot jelly cooked on low for six hours. We made sandwiches, soups, and pastas with that ham, but one of the more memorable meals was a breakfast pizza that Matt, Mia and I made together. I love making breakfast pizzas so much, and I have for many years. I began waiting tables in a pizza restaurant when I was just 19. The pizza cooks introduced it to me then, and I have been addicted ever since. Eggs instead of red sauce -- that's the key difference.
Our pizza consisted of eggs, ham, caramelized onions, fresh thyme, red peppers, mozzarella and Parmesan cheeses, and mashed potatoes (also leftover from Thanksgiving). To make a breakfast pizza, you lay out your dough just as you would any pizza; since this will be a very wet pizza to begin with, you must work very quickly, and you should have some type of flour or cornmeal underneath the dough to create friction when you slide into the oven (we use a pizza stone -- works wonders in the home oven). Create your egg base. Use 2-3 eggs that you have mixed with a whisk. Gently turn up the sides of the dough so that the egg will not fall off the edges. Pour the egg mixture over. Then top with your chosen toppings. Be quick about it so that the dough doesn't stick to the work surface. Once done, slide into a 450 degree oven and cook until done.
For Thanksgiving, we made a Crock pot ham; it was just the three of us, a low key affair, and we made enough ham to have leftovers for days and days and days. The Crock pot ham recipe was simple: ham, ginger ale, and apricot jelly cooked on low for six hours. We made sandwiches, soups, and pastas with that ham, but one of the more memorable meals was a breakfast pizza that Matt, Mia and I made together. I love making breakfast pizzas so much, and I have for many years. I began waiting tables in a pizza restaurant when I was just 19. The pizza cooks introduced it to me then, and I have been addicted ever since. Eggs instead of red sauce -- that's the key difference.
Our pizza consisted of eggs, ham, caramelized onions, fresh thyme, red peppers, mozzarella and Parmesan cheeses, and mashed potatoes (also leftover from Thanksgiving). To make a breakfast pizza, you lay out your dough just as you would any pizza; since this will be a very wet pizza to begin with, you must work very quickly, and you should have some type of flour or cornmeal underneath the dough to create friction when you slide into the oven (we use a pizza stone -- works wonders in the home oven). Create your egg base. Use 2-3 eggs that you have mixed with a whisk. Gently turn up the sides of the dough so that the egg will not fall off the edges. Pour the egg mixture over. Then top with your chosen toppings. Be quick about it so that the dough doesn't stick to the work surface. Once done, slide into a 450 degree oven and cook until done.
Friday, August 6, 2010
Cheryl Thrower Art Gallery on Display August 17th
I am so excited about our newest artist on display in our rotating art gallery. Cheryl Thrower is a former student of mine, and her talents are impressive. She is currently a student at SCAD majoring in animation, and she has been working all summer to create a new collection entitled "Momentum." Her work will be all originals, all distinctly Cheryl, and all wonderfully inventive and original. Her aesthetic is organic, playful, feminine, and romantic. You will be so impressed by this young artist, and I know you will want to purchase every one of her pieces. You can see her work beginning August 17th at 5pm.
Labels:
animation,
art,
art gallery,
Cheryl Thrower,
Cumming Georgia,
Mia's Pizza and Eats,
SCAD
Monday, July 12, 2010
Summer Bruschetta
The Katydid song plays in the background as I gently pluck ripe tomatoes from their vines. I surmise the damage the sun has reaped upon my tomato plants' delicate leaves and feel a pang of regret as I accept that summer is quickly passing and that it will be an entire year before I can grow tomatoes again. This momentary melancholy soon fades as I catch a whiff of that lovely liquorice, sweet smell of basil. My basil is booming, and my tomatoes are sweet and ripe. What better way to celebrate than to make bruschetta?
My recipe for bruschetta is simple, delicious, and satisfying. It is the perfect accompaniment to a fine crusty bread. I happen to have a rustic loaf of bread from Mia's Pizza. We make it from dough scraps that have risen for a while, and the result is this lovely, crusty, sourdough bread. We use it to make breadcrumbs, croutons, and garlic bread for catering events. It is my favorite of the two types of breads that we make, and its rustic nature will go perfectly with my summer harvest.
Bruschetta is a simple dish. Mine consists of fresh tomatoes, fresh basil, garlic, balsamic glaze, olive oil, salt, and pepper. To make, just chop your tomatoes (mine are small, so I cut in half only), chop the basil chiffonade style, press 1-2 cloves garlic in a garlic press (or mince finely), drizzle with balsamic glaze and olive oil (no more than 2 tablespoons each), and add salt and pepper to taste. I mix the ingredients lightly with a spoon and serve in a bowl. On the side, I include toasted bread which I have drizzled with olive oil and sprinkled with salt and pepper. Roasted garlic also makes a great accompaniment, which is easy to make. Cut the tops off the whole garlic head and place in a baking dish. Drizzle the tops with olive oil, sprinkle with salt and pepper, and throw a few sprigs of thyme on top. Cover with aluminum foil and bake at 500 degrees for about 30 minutes. Once finished, you will have delicious, sweet cloves of caramelized garlic that spread over bread like butter.
This summer bruschetta dish was such a lovely, light dinner for my family. I also served some sauteed green beans on the side which were so delicious and easy. Simply add a little olive oil to a pan, throw in the green beans and sprinkle with salt and pepper. Saute for a few minutes, and then remove from heat. The result is a lovely, crunchy green bean side dish, perfect for all occasions. This lovely dinner was my tribute to my summer harvest. Simple and divine. Enjoyed with my family. Nourishing and sweet.
Friday, July 9, 2010
Pizza Play Date
I have never been the type of person who eagerly makes new friends. I am someone who feels most comfortable with one or two very close friends, and I find it kind of hard to truly commit to the work it takes to add a new friend into my fold. All that changed when I became a mom. For the good of my child, I must make friends and plan play dates and be more social than I care to be, which I have found isn't so hard, and I like the connections I am making. This summer, I have been particularly active on the play date set, and I have made a few good friends in the process. When I host a play date at my house, I have a structured approach that allows lots of interaction for the kids, and also time for us moms to chat, drink coffee, and get to know each other. My play dates involve lots of play outside, some type of craft, and lunch or snack.
Recently I planned a pizza themed play date, and I thought it was particularly appropriate to write about it here. A good friend from work brought her two-year old daughter, and the girls played in the kiddie pool out front while said coworker and I caught up on our summer adventures. After a healthy amount of the outdoors, we brought the girls inside to make pita bread pizzas for lunch. I have been making pita bread pizza since I was in college. It is a go to meal that I almost always have the ingredients to make. It was the perfect nosh when I was pregnant and breastfeeding because it had all the good things my body needed to nourish Mia and me. Now I serve it to Mia on a regular basis, and the creation of it is something in which she can participate.
You begin with your favorite pita bread slice. I use a whole wheat version simply because it's healthier. Then you spoon out a desired amount of sauce (I use store bought spaghetti sauce). Next pile on your toppings. On this day we had red peppers, green olives, mushrooms, and chicken breast. Finally, sprinkle with mozzarella and parmesan cheeses. Bake on a cookie sheet in the oven (set at 350 degrees) until it is golden brown. These also do very well in a toaster oven.
While the pizzas baked, we had the girls create Paper Bag Pizzas. These are so simple, and they allow the kids to explore different types of artistic media. The supplies are basic: several paper bags that you have cut into large triangular pizza shapes, lots of pizza toppings cut from paper scraps, various small pom poms, and glue (I also use a sponge brush for the kids to paint the glue on to the paper). I prepared everything before the play date began so that it was ready to go, preventing too much down time. Paper Bag Pizzas are an inexpensive and fun craft that the girls really enjoyed.
Having a child has done many things to enhance my life, and I think the play date has taught me that making new friends is actually a fun experience. They also allow me to be creative with my child, which is always a plus.
Tuesday, June 29, 2010
A [pizza] is worth a 1000 words
This June heat has been so oppressive. I feel as if I am accomplishing very little, and that is perfectly fine with me. Mia and I just spend our days walking in the park, playing in the kiddie pool, digging in the sand box, watching Disney movies, and napping together. Today, we did make the drive up to the restaurant, and we enjoyed the cool breeze on the patio. Our lunch consisted of Greek Pasta salad and Greek spinach pie along with a cheese slice for Mia. I also created a Foursquare account today -- once we are verified, I will be sharing specials and deals there. So much social networking, so little time.
Subscribe to:
Posts (Atom)